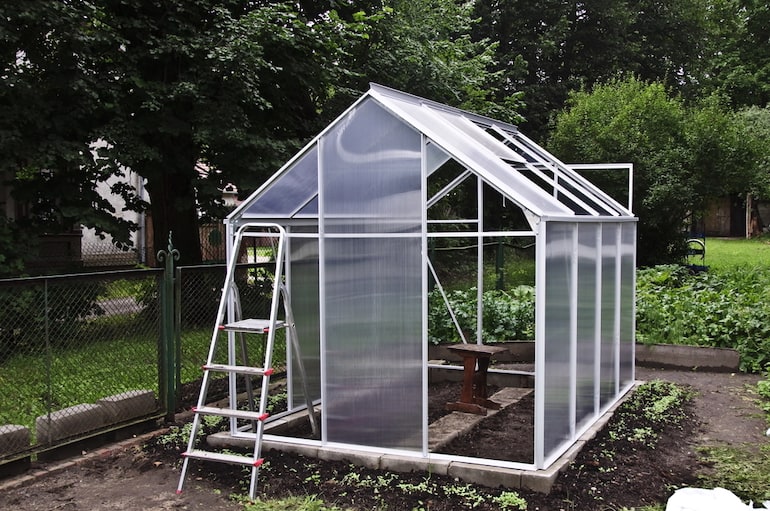
I love my garden, and I’ve worked on it for a long time. It’s full of beautiful plants and flowers that show my love for gardening. But sometimes, the weather can be a problem. So, I thought about getting a greenhouse, a special place to keep my plants safe from bad weather and let them grow for a longer time. What I didn’t know was that this decision would make me learn something really important: how to make sure the plastic on the greenhouse stays in place.
So, I decided to buy a greenhouse. It’s like a safe home for my plants, where they can grow longer and not worry about bad weather. But I didn’t realize that this would make me learn something very important: how to keep the plastic on the greenhouse in place.
In this guide, I’ll take you on a journey through the art and science of securing greenhouse plastic.
To secure greenhouse plastic effectively:
- Ensure the greenhouse structure is in good condition.
- Cut the plastic sheet to size and reinforce its edges with batten tape.
- Start securing the plastic from one end, using spring clips or wiggle wire in a frame channel.
- Secure the sides with staples, screws, or glazing clips.
- Consider using double-sided greenhouse tape for added security.
- Trim excess plastic for a neat appearance.
- Optional: use plastic film fasteners for extra reinforcement.
- Regularly inspect and maintain the plastic covering to ensure it remains secure and protected.
What Materials and Tools Need to Secure Greenhouse Plastic?
Before diving into the process of securing greenhouse plastic, it’s essential to gather the necessary materials and tools to ensure a successful and durable installation.
List of materials needed for securing greenhouse plastic:
Securing greenhouse plastic requires specific materials to ensure a long-lasting and effective covering. Here’s a detailed list:
Greenhouse Plastic Sheeting: Choose a high-quality UV-resistant greenhouse plastic that suits your climate and needs.
Fasteners: Depending on your chosen method (staples, clamps, or other), you’ll need the appropriate fasteners. For staples, you’ll need a heavy-duty stapler and staples. For clamps, greenhouse spring wire or poly lock channel and wiggle wire can be essential.
Batten and Lath (if applicable): If you opt for this method, you’ll need wooden or PVC battens, along with lath strips.
Ropes or Twine (if applicable): Nylon ropes or twine can be used for securing the plastic.
Insulation Materials: Depending on your climate, you may require additional insulation materials such as bubble wrap or shade cloth.
Sealants: Silicone caulk or specialized greenhouse tape for sealing gaps and holes.
Tools for Insulation: Utility knife or scissors for cutting insulation materials.
Essential tools required for the job:
Proper tools are crucial for ensuring a secure greenhouse covering:
Tape Measure: For accurate measurements of the greenhouse structure and plastic sheeting.
Utility Knife or Scissors: For cutting the plastic sheeting and insulation materials.
Stapler and Staples (if using staples): A heavy-duty staple gun designed for outdoor use.
Clamps or Clip Applicator (if using clamps): To securely attach the clamps or clips.
Drill (if using screws or fasteners): If you opt for a screw-based method, you’ll need a drill and appropriate drill bits.
Ladder or Scaffold: Depending on the height of your greenhouse, you may need a ladder or scaffold for access.
Safety Gear: Safety goggles, gloves, and appropriate clothing for protection.
What Are Effective Securing Techniques for Greenhouse Plastic?
When it comes to safeguarding your greenhouse plastic, employing effective securing techniques is crucial to maintain its integrity and maximize its benefits.
Stapling the plastic to the frame:
Proper stapling methods:
- Overlap and Stretch: Start at one corner and staple the plastic to the frame while slightly stretching it. This ensures a tight and wrinkle-free fit.
- Staple Angle: Insert staples at a slight angle (about 45 degrees) to the frame. This provides better grip and reduces the chances of tearing the plastic.
- Spacing: Space staples approximately 6 to 12 inches apart along the entire perimeter. Closer spacing may be necessary in windy areas.
- Avoid Over-Stapling: While it’s essential to secure the plastic, avoid over-stapling, as this can create weak points and potentially tear the plastic during temperature fluctuations.
Staple spacing and positioning:
- Start and Finish: Begin stapling at a corner or edge, and work your way around the frame. Finish stapling at another corner or edge to ensure a continuous seal.
- Door and Ventilation: Pay special attention to doors and ventilation openings, ensuring that the plastic is well-secured but still allows for easy access or airflow.
Using greenhouse clamps or clips:
Different types of clamps available:
- Wire Spring Clamps: These are commonly used and easy to attach. They grip the plastic and snap onto the frame, holding it in place.
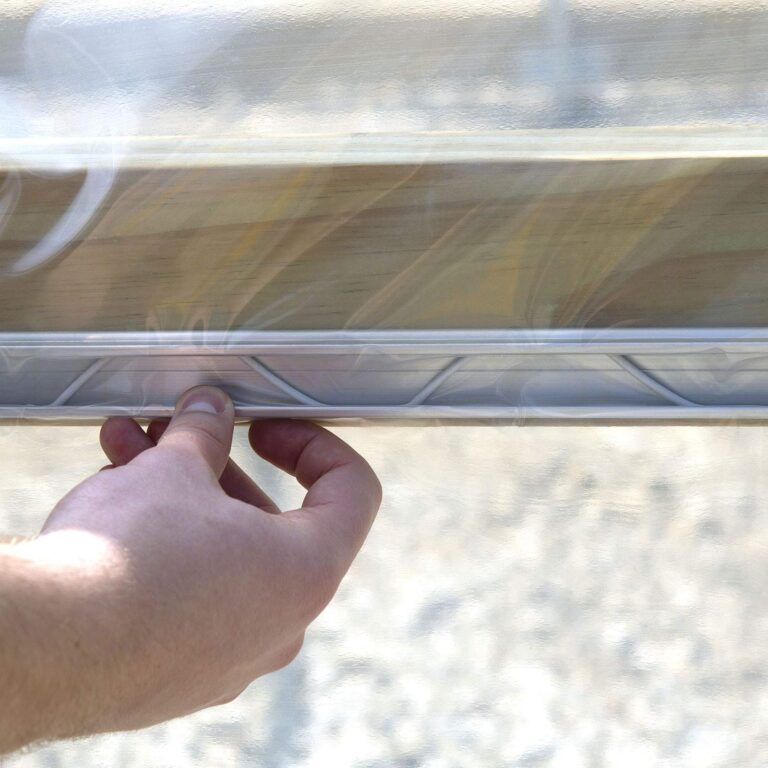
- Poly Lock Channels with Wiggle Wire: These are more secure and provide better tension distribution. Poly lock channels are attached to the frame, and the wiggle wire is used to secure the plastic within the channel.
- Snap or Snap-On Clamps: These clamps snap over the plastic and onto the frame, holding it securely.
Correct application of clamps:
- Proper Spacing: Ensure that clamps are evenly spaced along the frame, typically 2 to 4 feet apart, depending on the type of clamp and the wind conditions in your area.
- Tension Adjustment: With wiggle wire or spring clamps, adjust the tension by applying moderate pressure. The goal is to have the plastic taut but not overly stretched.
- Checking Periodically: Periodically check and readjust clamps, especially during temperature fluctuations, to prevent sagging or tearing.
Batten and lath installation:
Explaining the batten and lath system:
- Battens: These are long, thin strips (typically wood or PVC) that are attached to the greenhouse frame. They create a framework for securing the plastic.
- Lath Strips: Lath strips are attached to the battens, creating a grid-like pattern. The plastic is sandwiched between the lath and the frame, holding it securely.
Step-by-step installation guide:
- Attach Battens: Secure the battens horizontally and vertically to the greenhouse frame. Ensure they are level and evenly spaced.
- Install Lath Strips: Screw or nail lath strips onto the battens, creating a grid pattern.
- Stretch Plastic: Lay the plastic over the frame and between the lath strips. Start at one end and work your way to the other, stretching the plastic as you go.
- Secure Plastic: Use staples, screws, or clips to secure the plastic to the lath strips, ensuring it is evenly tensioned.
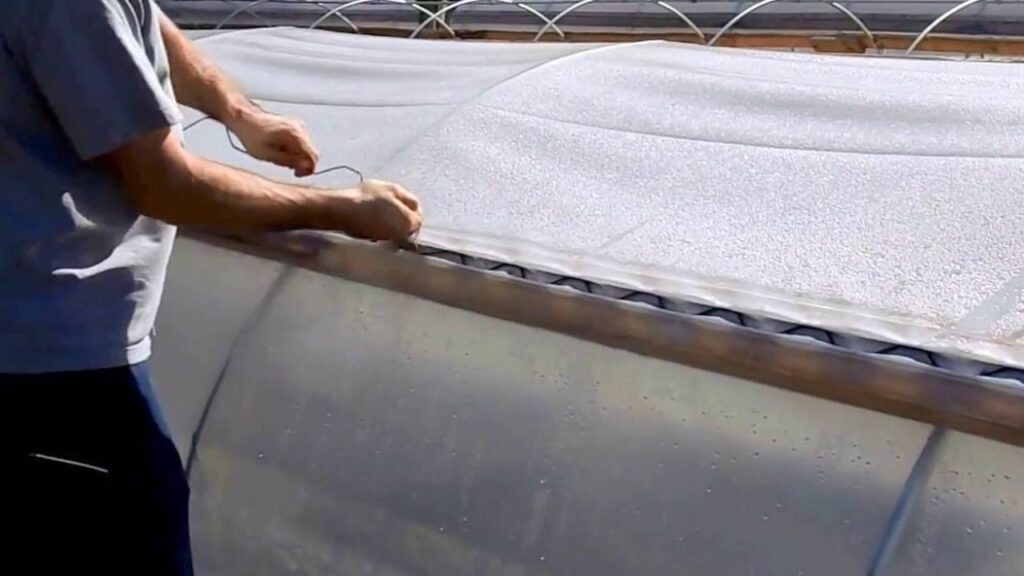
Rope or twine securing methods:
How to tie and tension ropes effectively:
- Anchor Points: Secure one end of the rope or twine to a sturdy anchor point on the greenhouse frame.
- Weaving or Wrapping: Start at one corner and weave or wrap the rope or twine around the frame and the plastic, creating a zigzag pattern.
- Tensioning: Apply even tension as you go. The goal is to keep the plastic taut without overstretching it.
- Knots or Fasteners: Finish by tying knots or using fasteners to secure the rope or twine at the opposite corner. Make sure it’s firmly anchored.
- Regular Checks: Periodically check the tension and adjust the ropes or twine as needed, especially during temperature changes or windy conditions.
How to Improve Greenhouse Insulation and Sealing?
Enhancing greenhouse insulation and sealing is the key to creating an optimal environment for your plants, increasing energy efficiency, and ultimately boosting your gardening success.
Insulating the edges and seams:
Preventing drafts and heat loss: Proper insulation helps maintain a stable and controlled environment inside the greenhouse by preventing drafts and heat loss during colder seasons.
Seal gaps and seams to prevent cold air from entering the greenhouse. Cold drafts can damage plants and reduce heating efficiency.
Moreover, effective insulation also aids in retaining heat generated by heating systems, reducing energy costs.
Choosing suitable insulation materials: Bubble wrap is an inexpensive and effective insulation material. It can be attached to the inside of the greenhouse frame, covering seams and edges.
Furthermore, shade cloth can serve as insulation during cold weather. It can be draped over plants or attached to the frame to create a thermal barrier.
Some gardeners use a double layer of greenhouse plastic with an air gap in between as an insulating layer. Furthermore,rRigid foam insulation boards can be used to insulate the walls and roof of the greenhouse.
Sealing gaps and holes:
Identifying common leakage points: Check the seals around doors and windows, as these are common leakage points. Weatherstripping can help create a tight seal.
Moreover, ensure that vents and louvers close tightly when not in use. Gaps in these areas can lead to heat loss. In addition, inspect the base or foundation of the greenhouse for any gaps or cracks that may allow drafts or pests to enter.
Roof and Panels: Look for damaged or loose panels on the roof or walls, as well as any gaps between panels or seams.
Using appropriate sealants: Silicone caulk is an excellent choice for sealing gaps around doors, windows, and vents. It’s weather-resistant and flexible.
Specialized greenhouse repair tape is designed to patch small holes or tears in the plastic covering. Furthermore, expanding foam sealants can be used to fill larger gaps and voids, providing insulation and airtightness.
Install weatherstripping around the edges of doors and windows to create a tight seal when closed. For securing and sealing plastic seams and edges, use polyethylene tape designed for greenhouse applications.
FAQ’s
How do you secure greenhouse film?
Greenhouse film can be secured using various methods such as staples, clamps, battens, or ropes, ensuring it’s tightly stretched and anchored to the greenhouse frame.
How do you secure plastic to a PVC greenhouse?
You can secure plastic to a PVC greenhouse by using PVC clips, channel lock systems, or by sandwiching the plastic between wooden battens and the PVC frame.
How do you secure greenhouse plastic to wood?
Greenhouse plastic can be secured to wood frames by stapling it directly to the wood, using wooden battens and lath strips, or employing specialized fasteners designed for wood structures.
How durable is greenhouse plastic?
The durability of greenhouse plastic can vary based on its quality. High-quality, UV-resistant greenhouse plastic can last several years, but exposure to harsh weather conditions may affect its longevity.
Is greenhouse film waterproof?
Yes, greenhouse film is typically waterproof. It is designed to protect plants from rain and moisture while allowing sunlight to penetrate.
How do you seal a greenhouse gap?
Gaps in a greenhouse can be sealed using sealants like silicone caulk, specialized greenhouse repair tape, or expanding foam sealants, depending on the size and location of the gap.
Final Words
In conclusion, my journey to understanding how to secure greenhouse plastic has equipped me with invaluable insights into the intricacies of maintaining a thriving greenhouse environment.
From the meticulous selection of materials and tools to the art of securing techniques, I’ve learned that a well-maintained greenhouse is a testament to both science and craftsmanship. The significance of insulating edges, sealing gaps, and periodic maintenance cannot be overstated, as they directly impact the health of the plants within.
Moreover, the adaptability of a greenhouse to different seasons, whether in the form of winterizing for frigid months or preparing for the scorching summer, underscores the dynamic nature of greenhouse management.