
To reduce humidity in a grow tent, you can:
- Increase Ventilation: Increase air circulation by adding more exhaust fans or increasing speed to remove moist air.
- Use a Dehumidifier: Install a dehumidifier to actively remove excess moisture from the air in the grow tent.
- Control Watering: Be mindful of watering practices to avoid overwatering, which can contribute to high humidity.
- Choose Proper Ventilation Times: Ensure that ventilation systems run during periods of high humidity, especially during the dark cycle when plants release moisture.
- Add Silica Gel or Desiccants: Place silica gel packets or other desiccants inside the grow tent to absorb moisture.
Remember, it’s important to monitor humidity levels regularly and adjust as needed for the specific needs of your plants.
Introduction on How To Lower Humidity In Grow Tent
Humidity is super important for your plants to grow well. It’s all about the water vapor in the air, which affects how your plants take in nutrients, release water, and do their essential processes.
You need to keep the right humidity levels to ensure your plants grow strong.
Transpiration Regulation: Humidity directly affects how much water your plants release through their leaves. This matters because it helps with nutrient transport and keeps your plants cool.
Nutrient Absorption: The amount of moisture in the air is key for your plants to absorb the good stuff from the soil. If it’s too dry or wet, it can mess with your plants’ ability to take in the necessary nutrients.
Metabolic Processes: Humidity also plays a part in important plant processes like making food through photosynthesis and breathing (respiration). These processes are crucial for your plant’s energy and overall health.
Ideal Humidity Levels for Different Growth Stages
Understanding Recommended Humidity Ranges
The air’s moisture is really important for how plants grow and stay healthy. It affects things like how they sweat (transpiration), take in nutrients, and their overall well-being.
Different plant species have varying humidity preferences, and understanding recommended humidity ranges is essential for successful cultivation. Here are general guidelines for humidity levels during different growth stages:
Propagation Stage:
Seed Germination: High humidity (around 70-100%) is often recommended for seed germination to create a favorable environment for seedlings to emerge.
Cloning: Clones or cuttings also benefit from high humidity, promoting root development. Levels around 70-80% are typically recommended.
Vegetative Stage:
Early Vegetative: Moderate to high humidity levels (40-70%) are suitable during the early vegetative stage. This helps prevent excessive water loss through transpiration while providing enough moisture for robust growth.
Late Vegetative: As plants develop, humidity can be gradually reduced to discourage issues such as mold and mildew. Aim for 40-60% humidity in the later vegetative growth stages.
Flowering Stage:
Early Flowering: Moderate humidity levels (40-60%) are generally recommended to avoid issues like bud rot during the early flowering stage.
Late Flowering: Humidity should be lowered further during the late flowering stage (30-50%) to prevent mold and encourage the proper maturation of flowers.
Harvest and Drying:
During the harvest and drying phase, it’s crucial to maintain low humidity levels (40-50%) to prevent mold growth on harvested plants.
Tailoring Humidity Levels to Plant Life Cycles
Monitoring and Adjusting:
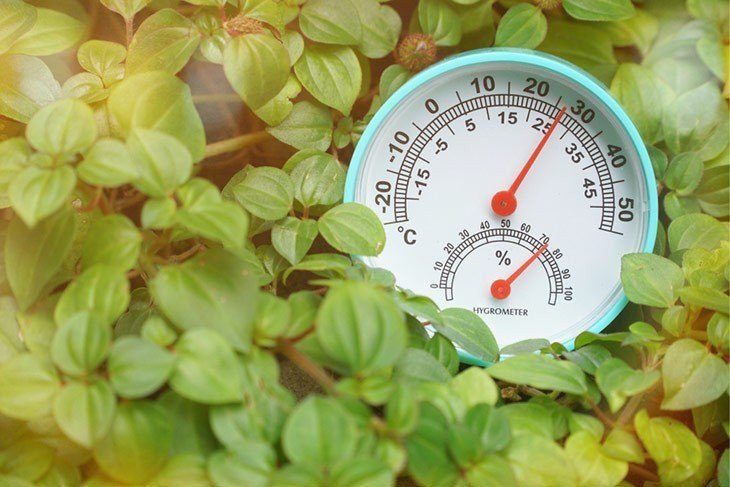
Regularly monitor humidity levels using hygrometers to ensure they fall within the recommended ranges.
Adaptation to Microclimates:
Recognize that different areas within a cultivation space may have varying humidity levels. Adapt cultivation practices accordingly to create microenvironments suitable for specific growth stages.
Cultivators can optimize conditions for plant health, yield, and overall success in cultivation endeavors by understanding and tailoring humidity levels to different growth stages.
Ventilation Optimization
Importance of Proper Air Exchange
Oxygen and Carbon Dioxide Exchange:
It’s really important to have good airflow so that plants can get the oxygen they need and give off carbon dioxide during photosynthesis. This helps them breathe and grow well.
Temperature Regulation:
Ventilation helps regulate temperatures within the growing environment. It prevents heat buildup, especially in indoor cultivation settings, where high temperatures can negatively impact plant health and growth.
Humidity Control:
Good airflow helps control humidity by getting rid of extra moisture in the air. This is crucial to avoid problems like mold and mildew, especially in places with lots of humidity.
Preventing Stale Air:
Air that doesn’t move can attract harmful things like germs and bugs. Good ventilation reduces the chance of diseases and pests by keeping the air fresh and circulating well.
Adjusting Ventilation for Humidity:
Using Exhaust Fans:
Put in fans that push out old air and extra humidity. This is especially important when plants are flowering to avoid bud rot and mold.
Adding Intake Fans:
Use fans to bring in fresh air from outside. This keeps a constant supply of oxygen and helps keep the airflow balanced in space.
Utilizing Variable Speed Controllers:
Implement variable speed controllers for fans to adjust the rate of air exchange based on specific environmental conditions. This allows for precise control over humidity and temperature levels.
Creating Negative Pressure:
Design the ventilation system to create a slight negative pressure within the cultivation space. This helps ensure that air is consistently drawn out, preventing the escape of odors and contaminants.
Using Inline Fans and Oscillating Fans Strategically
Inline Fans:
Install inline fans in the ducting system to enhance air exchange efficiency. These fans can be positioned to exhaust air directly from the grow lights or other heat-producing equipment.
Oscillating Fans:
Place oscillating fans strategically within the growing space to promote even air circulation. Oscillating fans prevent stagnant air pockets and help strengthen plant stems by simulating natural breezes.
Positioning for Uniform Coverage:
Ensure that fans are positioned to provide uniform coverage throughout the entire plant canopy.
During the light cycle’s dark period, reduce the fans’ intensity to avoid excessive cooling, which could lead to temperature fluctuations. This is especially important during the flowering stage when maintaining stable temperatures is crucial.
Temperature Management
Influence of Temperature on Relative Humidity
Temperature and Relative Humidity Relationship:
Understand the inverse relationship between temperature and relative humidity. As temperature increases, air can hold more moisture, leading to a decrease in relative humidity. Conversely, lower temperatures result in higher relative humidity.
Condensation Risk:
Be aware that rapid temperature drops can cause condensation, potentially leading to issues such as mold and mildew. Proper humidity control measures should be in place to mitigate these risks.
Vapor Pressure Deficit (VPD):
Consider the Vapor Pressure Deficit, which is the difference between the amount of moisture in the air and the maximum amount the air can hold at a specific temperature. Maintaining an optimal VPD is crucial for plant health and growth.
Balancing Heat Sources for Humidity Reduction
Choosing Efficient Lighting:
Select lighting systems that produce less heat while providing the necessary spectrum for plant growth. For example, LED lights generate less heat than traditional high-intensity discharge (HID) lights.
Heat Extraction Systems:
Install systems that remove extra heat, like air-cooled reflectors or heat exchangers, to cool down the heat produced by grow lights. This keeps the temperature in check and lowers humidity.
Distributed Heat Sources:
If multiple heat sources are present in the cultivation space, strategically distribute them to maintain uniform temperatures. This prevents localized hotspots that could adversely affect plant health.
Temperature Monitoring:
Use temperature monitoring devices to track variations in the cultivation environment. Automated systems can adjust heat sources based on real-time temperature data.
Day-Night Temperature Cycling Techniques
Temperature Differential for Optimization:
Implement day-night temperature differentials to mimic natural environmental conditions. Allow a slight drop in temperature during the dark period to simulate the nighttime cooling effect.
Daytime Temperature Management:
Maintain daytime temperatures within the optimal range for the cultivated plant species. This ensures that photosynthesis and metabolic processes proceed efficiently.
Nighttime Temperature Drop:
Gradually reduce temperatures during the dark period to stimulate certain physiological processes beneficial for plant development. However, avoid extreme temperature fluctuations, as this can stress plants.
Automated Climate Control Systems:
Invest in automated climate control systems that can regulate temperature cycles based on predefined parameters. These systems can integrate with other environmental controls, such as lighting and humidity management.
Monitoring and Adjusting:
Regularly monitor the effects of temperature cycling on plant growth and adjust the temperature differentials as needed. Pay attention to plant responses to ensure that the chosen temperature management strategy is optimal.
Effective temperature management is essential for creating a stable and conducive environment for plant growth.
Dehumidification Through Plant Care
Choosing Low-Humidity Tolerant Plant Varieties
Researching Plant Varieties:
Conduct thorough research to identify plant varieties that are inherently more tolerant to lower humidity levels. Some plants have natural adaptations that make them better suited for drier conditions.
Drought-Tolerant Species:
Choose plant species that are known for their drought tolerance. These plants have mechanisms to conserve water and may be more resilient in environments with lower humidity.
Native and Local Varieties:
Consider selecting plant varieties that are native to or well-adapted to the local climate. Native plants often have characteristics that make them better suited to the specific humidity levels of the region.
Consulting with Experts:
Seek advice from experienced horticulturists or local plant experts who can provide insights into the humidity preferences of different plant varieties. They can offer guidance on selecting plants that thrive in lower humidity conditions.
Pruning and Thinning Techniques for Improved Airflow
Thinning Canopy Density:
Thin out the canopy by selectively removing excess foliage. This improves airflow within the plant canopy, reducing the risk of humidity buildup and creating an environment less conducive to mold and disease.
Selective Pruning:
Practice selective pruning to remove crowded or overlapping branches. This enhances airflow and allows for better light penetration, promoting overall plant health.
Removing Diseased or Damaged Parts:
Regularly inspect plants for diseased or damaged sections and promptly remove them. If parts of the plant are sick or hurt, it can make the air more humid and give a place for bugs and germs to grow.
Lollipopping Technique:
Utilize the lollipopping technique, which involves removing lower branches and foliage that are unlikely to receive sufficient light. This reduces humidity in the lower portion of the plant and directs energy toward upper growth.
Managing Watering Practices for Humidity Control
Watering Frequency:
Adjust the watering frequency to the plant’s specific needs and the prevailing humidity levels. Avoid overwatering, as excessive moisture in the soil can contribute to elevated humidity in the growing environment.
Watering Techniques:
Use methods like drip irrigation or watering from the bottom to give water directly to the roots without getting the leaves too wet. This helps avoid sudden increases in humidity from water evaporating off the surface.
Monitoring Soil Moisture:
Use soil moisture meters to monitor the moisture content in the growing medium. This allows for precise control over watering practices, preventing both underwatering and overwatering.
Watering Timing:
Water plants during the early part of the day to allow excess moisture on leaves to evaporate during daylight hours. This reduces the risk of prolonged high humidity levels during the night.
Desiccants and Moisture Absorbers
Introduction to Desiccant Options
Understanding Desiccants:
Desiccants are substances that absorb and hold moisture from the air, effectively reducing humidity levels in the surrounding environment. They are commonly used in various applications, including humidity control in plant cultivation.
Silica Gel:
Silica gel is a popular desiccant due to its high moisture-absorbing capacity. It is often available in packets or canisters and can be easily regenerated by drying it out.
Calcium Chloride:
Calcium chloride is another effective desiccant known for its ability to absorb moisture rapidly. It is commonly found in commercial moisture-absorbing products.
Activated Charcoal:
Activated charcoal not only absorbs moisture but also helps eliminate odors. It can be used as a natural and environmentally friendly alternative to synthetic desiccants.
Clay Desiccants:
Clay-based desiccants, such as bentonite clay, are natural options that absorb moisture effectively. They are often used in packaging to prevent moisture-related damage.
Placement and Usage of Moisture-Absorbing Materials
Strategic Placement:
Place drying materials carefully around the growing area, especially in spots that tend to get more humid. Common spots are close to plant bases, in corners, or in enclosed spaces.
Enclosed Spaces and Cabinets:
Place moisture-absorbing materials inside enclosed spaces, cabinets, or storage containers where humidity accumulates. This is particularly useful for protecting stored equipment or harvested plants.
Silica Gel Packs:
Use silica gel packs in containers where seeds or dried herbs are stored. Silica gel helps prevent mold growth and maintains the quality of stored materials.
Calcium Chloride Buckets:
Set up buckets filled with calcium chloride in larger cultivation spaces.
Replacing and Regenerating:
Change or refresh drying materials as necessary. If you’re using silica gel, you can heat it to remove the moisture it absorbs. This makes it last longer and more cost-effective.
DIY Solutions for Natural Humidity Reduction
Rice in Socks:
Fill clean socks with rice and place them in areas where humidity is a concern. Rice acts as a natural desiccant, absorbing moisture from the air.
Baking Soda Containers:
Place open containers of baking soda in cabinets or near plants. Baking soda helps absorb excess moisture and can also neutralize odors.
DIY Silica Gel Packets:
Create your own silica gel packets by placing silica gel in permeable materials such as coffee filters or breathable fabric. Use these homemade packets in small spaces or containers.
Salt Bowls:
Fill bowls with table salt and place them strategically in the growing environment. Salt absorbs moisture and can be an inexpensive way to reduce humidity.
Ventilation and Airflow:
When using desiccants and moisture-absorbing materials, it’s important to regularly monitor humidity levels to ensure they remain within the desired range.
Combining these methods with other humidity control strategies, such as proper ventilation and plant care, contributes to a comprehensive approach to managing humidity in a cultivation environment.
Humidity-Reducing Substrates
Selecting Well-Draining Growing Mediums
Importance of Well-Draining Mediums:
Choose growing mediums that promote efficient drainage to prevent waterlogging and excess moisture around plant roots. Well-draining substrates are crucial for maintaining a healthy root environment.
Peat-Based Mixes:
Peat-based mixes are commonly used for their water retention properties but can be modified to improve drainage. Consider blending peat with perlite or vermiculite for a balance between water retention and drainage.
Coco Coir:
Coco coir is an alternative to peat that provides good aeration and drainage to retain moisture while allowing excess water to drain away, making it suitable for humidity control.
Aeration Amendments:
Integrate aeration amendments such as coconut chips, rice hulls, or pine bark into the growing medium. These amendments enhance porosity, promoting better airflow and reducing the risk of high humidity.
Adding Perlite or Vermiculite for Improved Drainage
Perlite for Aeration:
Perlite is a lightweight, volcanic rock material that improves aeration in the growing medium. It increases drainage by preventing compaction and facilitating air and water movement through the substrate.
Vermiculite for Water Retention:
Vermiculite is a mineral that retains water while improving drainage. Adding to the growing medium creates a balanced environment by holding moisture without allowing the substrate to become waterlogged.
Mixing Ratios:
Adjust the ratios of perlite or vermiculite to the base growing medium based on the specific needs of the plants and the desired balance between water retention and drainage.
Uniform Distribution:
Ensure that perlite or vermiculite is uniformly distributed throughout the growing medium. This promotes consistent drainage and prevents localized areas with varying moisture levels.
Hygrometers and Monitoring Tools
Investing in Accurate Humidity-Measuring Devices
Hygrometer Selection:
Choose high-quality hygrometers capable of accurate and reliable humidity measurements. Digital hygrometers are often preferred for their precision and ease of use.
Calibration:
Regularly calibrate hygrometers to ensure their accuracy. Calibration can be done using commercially available calibration kits or by following manufacturer guidelines.
Placement of Hygrometers:
Position hygrometers at different locations within the cultivation space to capture variations in humidity levels. Place them near plant canopies, corners, and areas prone to humidity fluctuations.
Data Logging Features:
Consider hygrometers with data logging capabilities. These devices can record and store historical humidity data, providing valuable insights into trends and variations over time.
Setting Up Regular Monitoring Schedules
Consistent Monitoring Times:
Monitor humidity levels at consistent times each day to capture patterns and changes in the cultivation environment. This consistency helps in making informed decisions about humidity management strategies.
Integration with Automation:
Integrate hygrometers with automated systems for real-time monitoring. Automated systems can provide alerts or adjust based on preset humidity thresholds, enhancing efficiency in humidity control.
Record-Keeping:
Maintain records of humidity measurements and any corresponding environmental conditions. Keeping detailed records aids in identifying trends, troubleshooting issues, and refining cultivation practices over time.
Adjusting Strategies Based on Humidity Data
Threshold Determination:
Establish specific humidity thresholds based on the requirements of the plants being cultivated. Different growth stages may have varying humidity preferences, and adjusting strategies accordingly is crucial.
Responsive Action Plans:
Develop predefined action plans for different humidity scenarios. For example, if humidity levels consistently exceed a set threshold, implement strategies such as increased ventilation, dehumidification, or adjustments to watering practices.
Integrating Environmental Controls:
Utilize environmental control systems that can be responsive to real-time humidity data. This may include automated adjustments to ventilation, lighting, or humidity control equipment based on hygrometer readings.
Consulting Expertise:
Seek advice from experienced horticulturists or professionals who can provide guidance on interpreting hygrometer data and making informed decisions for humidity management.
Continuous Improvement:
Continuously refine humidity management strategies based on ongoing monitoring and feedback.
DIY Humidity-Control Projects
Building a DIY Dehumidification System
Materials Needed:
Obtain materials such as a fan, silica gel packets, a plastic container, and a mesh or breathable fabric.
Assembly Steps:
Place silica gel packets inside the plastic container.
Cut openings in the container for airflow.
Mount a fan near the container to draw air through the silica gel, promoting dehumidification.
Ensure proper ventilation by placing the container strategically within the cultivation space.
Regular Maintenance:
Monitor and replace silica gel packets as needed.
Clean or replace the fan filter regularly to maintain optimal airflow.
Adjustable Design:
Design the system to be adjustable, allowing for modifications based on the size and humidity level of the cultivation space.
Creating Humidity-Absorbing Structures
Materials Needed:
Gather materials such as bamboo sticks, breathable fabric, and moisture-absorbing substances like rice or silica gel.
Assembly Steps:
Construct a frame using bamboo sticks to create a structure.
Wrap the structure with breathable fabric, leaving openings for air circulation.
Fill pockets within the structure with moisture-absorbing substances.
Placement and Rotation:
Place the humidity-absorbing structure strategically in areas with higher humidity.
Rotate and expose the structure to sunlight periodically to aid in moisture removal.
Reuse and Refill:
Design the structure for easy disassembly, allowing for the reuse of materials.
Refill or replace the moisture-absorbing substances as needed.
Low-Cost Alternatives for Humidity Management
Natural Desiccants:
In small, breathable bags, use natural desiccants like charcoal, rice, or rock salt.
Place these bags strategically around the cultivation space to absorb excess moisture.
Ventilation Enhancements:
Improve natural ventilation by strategically placing mirrors to reflect sunlight into darker corners, promoting airflow and reducing humidity.
DIY Air Circulation Fans:
Create low-cost fans using recycled materials like cardboard, computer fans, and USB power sources.
Position these DIY fans strategically to enhance air circulation within the cultivation space.
Humidity-Reducing Plants:
Incorporate humidity-reducing plants, such as snake plants or spider plants, into the cultivation space. These plants naturally absorb moisture from the air.
Homemade Hygrometer Calibration:
In a sealed container, Calibrate hygrometers using common household items such as a saturated salt solution (salt and water mixture). This DIY method can help maintain accurate humidity measurements.
DIY Air Purifiers:
Create simple air purifiers using activated charcoal. Place these DIY purifiers in strategic locations to help maintain a cleaner and less humid environment.
Remember to prioritize safety when undertaking DIY projects, especially when electrical components are involved.
Additionally, regularly monitor and adjust these DIY solutions based on the specific needs of the cultivation space and the effectiveness of humidity management.
FAQs
How can I lower the humidity in my grow tent?
Increase ventilation by using exhaust fans to circulate air and remove excess moisture.
Will using a dehumidifier help lower humidity in my grow tent?
Yes, a dehumidifier is an effective tool for reducing humidity levels in a grow tent.
Can I use silica gel packs to lower humidity in my grow tent?
Yes, strategically placing silica gel packs can help absorb excess moisture.
Are there natural methods to lower humidity in a grow tent?
Yes, incorporating humidity-absorbing plants, increasing airflow, and using breathable materials can naturally reduce humidity.
How often should I monitor humidity levels in my grow tent?
Regularly check humidity levels, preferably multiple times a day, especially during critical growth stages.
Should I adjust my watering practices to control humidity in the grow tent?
Yes, modifying watering frequency and techniques can impact humidity levels; avoid overwatering.
Can adjusting the temperature help lower humidity in the grow tent?
Yes, maintaining an optimal temperature can indirectly contribute to humidity control.
Is proper insulation important for humidity management in a grow tent?
Yes, well-insulated tents help regulate temperature and humidity more effectively.
What role do oscillate fans play in lowering the humidity in a grow tent?
Oscillating fans improve air circulation, preventing stagnant air and reducing humidity.
Can placing open containers of desiccants help lower humidity in a grow tent?
Yes, using desiccants like silica gel or rice in open containers can absorb excess moisture and reduce humidity.
Conclusion
In conclusion, effective humidity control is vital for successful plant cultivation, influencing various plant health and growth aspects.
Utilizing strategies, including proper ventilation, well-draining substrates, and monitoring tools such as hygrometers, allows cultivators to create an optimal and controlled environment.
DIY projects, ranging from homemade dehumidification systems to humidity-absorbing structures, offer cost-effective alternatives for managing humidity.