Building your own greenhouse shelving is an engaging DIY project that requires careful planning and precise execution. To start, gather materials like wood or metal shelves, essential tools such as a saw, drill, and measuring tape, and optional items like brackets or additional support beams. Begin by measuring your greenhouse dimensions to determine the size and quantity of shelves needed. Cut the materials to size, construct the shelves, ensuring they are level, stable, and appropriately spaced for plant maintenance.
Enhance durability by sanding rough edges and applying a weatherproof sealant or paint. Consider factors like weight capacity, space utilization, and safety precautions during construction. For a detailed visual guide, check out this helpful tutorial: DIY Greenhouse Shelving Tutorial:
How to Assess Greenhouse Space for Shelving?
When you think a lot about these things when planning, you can make the greenhouse shelves just right for your plants. This helps save space, makes the place good for plants to grow healthy, and makes it easy to take care of them.
Assessing Greenhouse Space and Dimensions
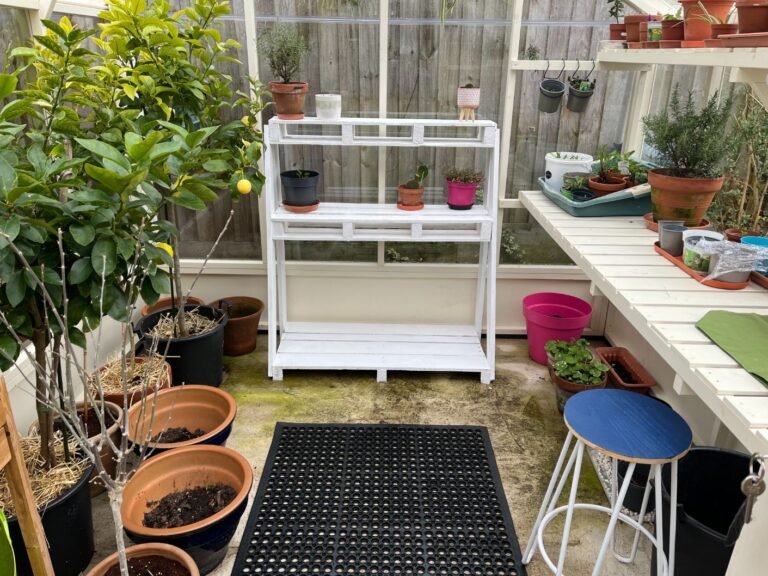
Assessing the available space within your greenhouse is crucial before designing shelving. Measure the length, width, and height of the area where you intend to place the shelves. Consider any obstacles such as vents, windows, or structural elements that might impact shelf placement.
Additionally, assess the layout for optimal sunlight exposure, ensuring the shelves won’t obstruct light access to your plants. Think about pathways and access points for easy movement while tending to your plants. Planning the layout based on these measurements and considerations will help in maximizing space utilization efficiently.
Determining Shelving Materials and Design
When choosing shelving materials, consider factors like durability, resistance to moisture, and suitability for outdoor use. Cedarwood, for instance, is resilient and naturally resistant to decay, making it an excellent choice for greenhouse shelving. Metal shelves can also be sturdy but may require surface treatment to prevent rust. Design the shelving units to accommodate different plant sizes and weights.
Adjustable shelves or modular designs can offer versatility, allowing you to customize the space according to the plants’ needs. Ensure that the chosen design aligns with the overall aesthetic of your greenhouse and complements its functionality.
Considering Plant Needs and Accessibility
Before finalizing the shelving design, consider the specific needs of the plants you intend to grow. Different plants require varying amounts of space, sunlight, and humidity. Plan shelf heights accordingly to accommodate taller plants or hanging baskets. Create space for trays or pots while ensuring adequate airflow around them to prevent moisture buildup.
In addition, accessibility is equally important—design shelves that allow easy access for watering, pruning, and harvesting. Incorporating features like removable or foldable shelves can facilitate cleaning and maintenance tasks while enhancing accessibility within the greenhouse.
What Essential Tools for Greenhouse Shelving?
Select materials and tools based on your preferences, considering factors like durability, aesthetics, and maintenance requirements.
Types of Shelving Materials (Wood, Metal, etc.)
| Material | Features | Recommended for |
| Wood | Versatile, customizable. Cedar, redwood, and pressure-treated lumber resist moisture and decay. Hardwoods like oak or maple are durable but heavier and pricier. | Customization, resistance to moisture/decay. |
| Metal | Durable, strong, rust-resistant. Suitable for heavy loads, easy to clean. May need surface treatment in humid areas. | Heavy loads, durability, easy maintenance. |
| Plastic or Resin | Lightweight, low-maintenance, resistant to moisture/rust. Less strong than wood or metal. Suitable for smaller plants or lightweight items. | Low-maintenance, small plants, lightweight items |
Essential Tools for Construction
- Saw: Circular saw, handsaw, or miter saw for cutting materials to size.
- Drill: Electric drill with drill bits for making holes and securing screws or nails.
- Measuring Tape: Accurately measure dimensions for cutting and assembly.
- Level: Ensure shelves are properly aligned and balanced.
- Screwdriver or Screw Gun: To drive screws into the wood or metal.
- Sandpaper: Smooth out rough edges for safety and aesthetics.
Optional Accessories
- Brackets: Provide extra support for shelves, especially if handling heavier loads. L-shaped brackets or corner braces enhance stability.
- Paint or Sealant: Apply weatherproof paint or sealant to protect wooden shelves from moisture and outdoor elements, extending their lifespan.
- Hooks or Hangers: Attach hooks or hangers to the shelving for hanging tools, hoses, or small potted plants.
- Casters or Wheels: Add mobility to shelves for easy repositioning or cleaning within the greenhouse.
- Shelf Liners or Mats: Protect shelves and prevent slippage by using liners or mats to cover the surfaces.
How to Enhance the Stability of Greenhouse Shelving?
If you do these steps carefully, you can make strong shelves for your greenhouse. They’ll be just right for what you need and will keep your plants and gardening tools safe and steady.
Preparing Materials – Cutting and Sizing
Use accurate measurements based on your design plan. Mark the shelves and support beams precisely using a measuring tape and pencil.
In addition, use appropriate tools like a circular saw or hand saw to cut the shelves and support beams according to the marked measurements. Ensure clean and precise cuts to fit the dimensions required for your shelving units.
After cutting, use sandpaper to smooth out any rough edges or surfaces on the shelves and beams. This step is essential for safety and aesthetics.
Building the Shelving Frames
Lay out the cut pieces according to the design. Attach support beams to the shelves using screws or nails. Use a drill for precision and ensure sturdy connections.
Use a level to ensure that the shelves are perfectly horizontal. Proper alignment is crucial for stability and even weight distribution.
If required, add L-shaped brackets or additional support beams for extra stability, especially for larger or heavier shelves.
Installing and Positioning Shelves in the Greenhouse
Before installation, clear the designated area in the greenhouse and ensure it’s clean and ready for the shelving units.
With the help of another person, lift and carefully position the assembled shelving units in the predetermined locations within the greenhouse. Ensure that they are placed securely without obstructing pathways or access points.
Position shelves at suitable heights considering plant needs and accessibility. Leave enough space between shelves for easy maintenance and air circulation around plants.
Enhancing Stability and Durability
Use anchors or screws to secure the shelving units to the walls or greenhouse framework, if necessary, to prevent tipping or shifting.
Furthermore, consider applying a weather-resistant sealant or paint to wooden shelves for added protection against moisture and outdoor elements.
Periodically check the shelves for any signs of wear, instability, or damage. Tighten screws or make repairs as needed to maintain stability and prolong the lifespan of the shelving
FAQ’s
How to build a greenhouse floor?
Building a greenhouse floor involves preparing the ground, laying a base of gravel or concrete, and adding flooring material like gravel, brick, or concrete pavers.
What base is best for a greenhouse?
The best base for a greenhouse typically includes options like gravel, concrete, or compacted soil, providing stability and proper drainage.
What material is used for greenhouse flooring?
Greenhouse flooring can be made of various materials, such as gravel, brick, concrete, or specialized greenhouse flooring tiles.
Do greenhouses need a base?
Yes, greenhouses generally need a stable base to support the structure, ensure proper drainage, and provide a level surface for the flooring.
Do greenhouses need foundations?
Yes, most greenhouses require foundations to support the structure, maintain stability, and prevent shifting or sinking.
Does a greenhouse need a slab?
Having a concrete slab foundation for a greenhouse offers stability, excellent drainage, and a level surface for the structure, but it’s not always mandatory, depending on the greenhouse type and location.
Final Words
In conclusion, making shelves for your greenhouse is a fun project but needs good planning and careful work. First, gather materials like wood or metal shelves, and tools such as saws, drills, and measuring tapes. Measure your greenhouse to know how big and how many shelves you need. Build the shelves well so they are flat, strong, and right for taking care of your plants.
To make them last longer, sand the edges and use weatherproof stuff on them. Think about the space and what your plants need when you design the shelves. Wood is good for changing things, metal is strong, and plastic is good for lighter things. Make sure you can easily reach your plants to water and take care of them.